I’ve been typing this for a couple of weeks and it’s amazing how long it takes to put coherent thought to paper, but here we are!
After decades of dreaming, years of planning and an endless amount of really long thought, it is done! We have made it to Alberta!
This new life comes with a endless excitement, some heartache, a bit of aggravation but more than anything else - satisfaction. My whole life I’ve been told “you can’t do that” on a hundred different subjects. One of them was this move. But I’ve always had the mindset that if that guy can do it, why not me?. All you need to do is take a step, and then another. I may not look like much but I’ve pulled off pretty crazy things that I’m a little surprised I got away with. The reason I’m saying all this is, if you have a dream, TAKE A STEP. Don’t let others get in your head and stop you from taking that step. You only take this ride once!
It’s just a little over a month since my last day at work. A 35.83 (decimals matter!) year career driving a desk for one of Canada’s largest police services. No badge for me of course, but I did get to work the rotating days, afternoons and nights schedule for most of that time. I also got to know a lot of truly great people and I’m quite thankful to have been able to share that time with them. And the fact that they put up with my pranks and sarcasm is an added bonus. I’m going to miss you all a lot and I’ve already had a few moments of realization hit me that it’s unlikely I’ll see most of them again and that’s sad. But the sendoff they gave me was far more than I could have ever earned in 2 careers so I will be forever grateful for it.
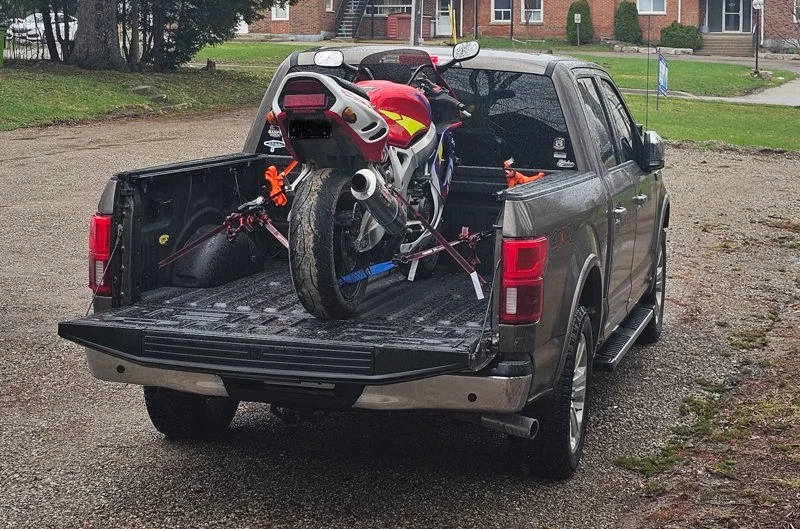
My baby all loaded up and ready to go
But that story is the past and I’m a present kind of guy. I’m happy to say that our trip went very smoothly. Thanks to some monster sized help from family, I was able to store my motorcycle safe and sound for the winter while we were living in an apartment and then get our PODS loaded up and all of our wordly belongings sent ahead for the journey to Alberta. If you ever need to move a great distance, I can’t say enough about them.
The journey was planned as being either 4 or 5 days - the first stop to be in Sault Ste. Marie Ontario where we would spend the night and meet up with a good friend for dinner and perhaps a bevvy. I’m very disappointed to say that this leg of the trip had to be snipped due to bad weather ahead.
Travelling through northern Ontario in the winter (and early) spring is a journey that isn’t without risk. For weeks I was watching the weather and roads reports and seeing our route closed almost daily due to a combination of terrible drivers and changing weather. This was the reason we didn’t drive our things out with a U-Haul. I’m no truck driver. Driving something that size on roads I don’t know in tricky weather is well over my head. Well as we closed in on “The Soo”, the weather over the next couple of days was looking awful and we may have been stuck there for a couple of days. That wasn’t going to work. So it was with a heavy heart that we had to cancel our plans to meet up and continue driving.
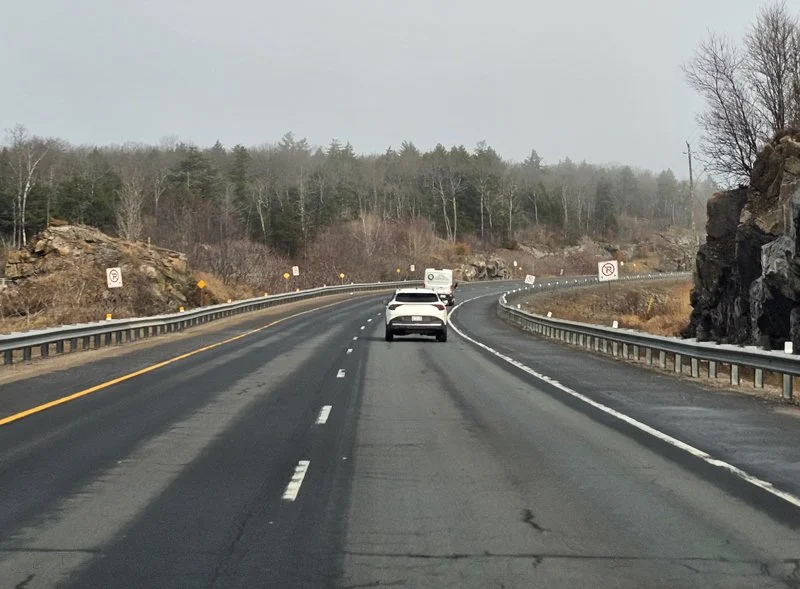
Canadian Shield is really something
Instead of spending the night on the southern end of Lake Superior, we continued driving to the far north side to Marathon, Ontario. For anyone making the trip, I would strongly suggest stopping here. The motel we stopped in was easily in the top 2 worst places I’ve ever been, but the next stop was probably Nipigon and we were done with driving for the day.
The next day began with a look at the weather and we were extremely relieved that we made the decision we did. Weather was indeed bad behind us and we would be passing above it and the day went off without a hitch. Beautiful scenery, plenty of music on a thumb drive, 2 way radios to talk since cell phone service is minimal and one heavy-breathing annoying little monster riding shotgun. I originally planned our second night would be spent in Thunder Bay, but since we made so much ground the previous day, we continued right through to Kenora - on the border of Manitoba. That’s a ton of mileage in just 2 days - there’s no way we would need 5 to get there!
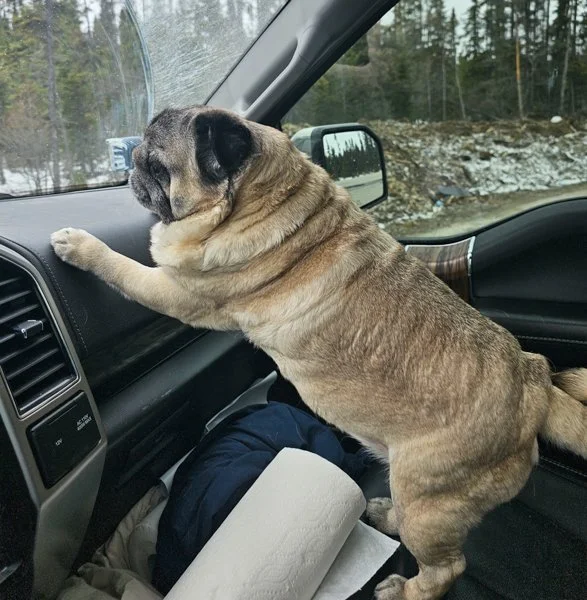
Hermie the stinky-faced wonderpug!
Day 3 began like the previous two - up early, optimistic about the miles behind us and soon to be leaving Ontario behind. It’s funny, when you get past a certain point, the giant hills (I won’t call them mountains) of Ontario disappear very quickly and you find yourself in the vast flat lands of the prairies. No more twisting roads - virtually dead straight all the way to Alberta.
Unfortunately this was the day that our luck changed. My motorcycle which was tied in the back must have shifted when going over a moon-crater pothole and it was only about 45 minutes into this drive when I went through a puddle on the road and heard a clunk in the bed of my truck. I looked in the mirror, fearing the worst and sure enough, there was my motorcycle lying on it’s side. At this point, the only thing I could do was slow down and look for a place to pull over.
Now, it’s funny - I’ve lived in southern Ontario almost my whole life and when we talk about going to Barrie or Algonquin, we call that “going up north”. But it’s not. It’s not even central Ontario in the grand scheme of things. So when I got out of the truck to stand the bike back up and tie it down, the straps were pretty frozen. Ever try to untie knots in frozen straps? It wasn’t fun. But we got it done and an hour later and a pleasant chat with an older fellah later who stopped to see if we were okay, we were on our way. Damage to the bike wasn’t too bad, but I bought it new 30 years ago - getting parts is not going to be easy - Maybe not even possible. I’ll fix what I can myself, the rest I’ll have to pray for.
The rest of the day went very smoothly. The bike didn’t move a hair through the nice smooth straight roads and before we knew it, we had made it to Swift Current. We knew we could have gone farther, but at this point, it was clear that we would arrive at our new home in just a matter of hours, so why get there exhausted without any of our belongings late a night when we could get a decent night sleep and arrive at noon the next day - so that’s what we did!
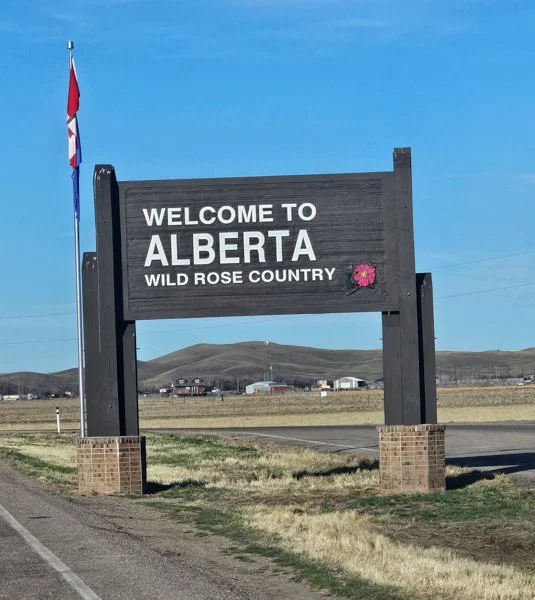
Home at last!
I think I’ve said in my last blog that when I was a kid, I did the cross country trip with my parents. Seeing this sign for our new home was just pure excitement. We made it! So many things fell in place to make this dream happen ultra smoothly that weren’t just long shots - they felt like miracles. All we could say was that it was meant to be.
When you drive a car (or truck) for a few days by yourself, a lot of things go through your head. Your past, your future, and if you’re smart, your present. You really need to take some time to appreciate the moment you’re in.
This country of ours is a lot bigger than the Greater Toronto Area. It’s bigger than the infrastructure we spend all of our time in. It’s even bigger than just one province. When you look out your window and give some thought to the lives the people are living as you pass by their houses, their farms, their ranches it should really open your eyes that people everywhere see things just a little differently. The things people value are different everywhere.
Now that I’m out here, I’m quite sure my values will change. I’m looking forward to experiencing the other side of this country and what it has to offer. We’ve been here just over a month and already we’ve been lucky enough to experience the mountains several times, see a huge variety of animals, sun every single day at least for a little while, the northern lights, and so much more and I can’t wait to see what’s next.
If you actually do read this, please feel free to drop a note and say hello and if you feel like it, share this with someone that maybe we both know. My exit from work was long planned out, but the last week was beyond chaos. When my last days came, all I could think of was, I thought I’d have more time to say goodbye.
That’s it for now. I was planning on an early night but I guess I’m past that now.
I have an exciting update coming in my next blog - No guarantees when that will come. There’s still so much work to do. G’nite!